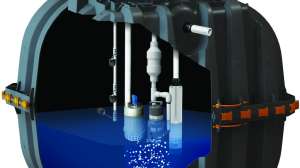
A simple fact in the world of onsite wastewater system installation is that not all systems can go below grade. Various circumstances bring treatment to the top, and there is a right and wrong way to install systems this way.
First things first
When installing a system at or above grade, the first thing to do is to ensure the soil treatment area is laid out on any contour if present so wastewater flows evenly and naturally through the system using the natural slope of the terrain. This prevents excessive wastewater accumulation in any one area and allows for even absorption into the soil. Even distribution across the STA is needed for proper treatment and acceptance for long-term system performance.
If the site is sloping, determine if a level base is needed or the system will slope with the change in elevation. Establishing a benchmark for the installation is another critical aspect of setting up for correct installation.
STA prep
If any trees are present in the area of the STA, they should be cut off at the soil surface and the stumps left. Removing the stumps will likely result in damaging the soil. The surface area taken up by the stumps is relatively small, so they will not affect water infiltration under the system.
If there is long grass, crops or other vegetation, it should be cut off and removed so that the remaining vegetation is no taller than 2 inches. All vegetation in excess of 2 inches in length, as well as any dead organic debris, must be removed from the surface of the total area under the aboveground system. This is critical to make sure the vegetation will not be a barrier to water movement. Some vegetation and the topsoil should be left in place to serve as a carbon source for potential nitrogen removal, and on many sites is the best soil for treatment and dispersal.
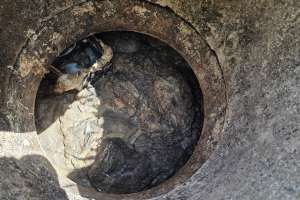
Soil surface preparation should be carefully conducted. A surface that has been smeared, compacted or otherwise made unsuitable for the movement of water will never recover its capacity to transmit water. For instance, effluent may seep out of the STA at the original grade where the system meets the original soil. Once the STA is in place, it will be extremely difficult to determine how the soil surface was prepared prior to system placement.
The soil should not be worked if it is too dry, too wet or frozen. If the soil is too wet or dry, soil smearing may occur. Compaction risk increases with increasing moisture content. Soils that are nearly saturated or saturated, meaning all the pore spaces are filled with water, have lower soil strength, and they will compact and smear more than the same soil under dry conditions.
Moisture testing
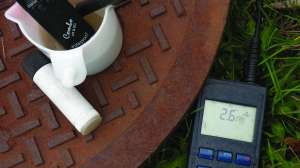
One method to check the moisture content is the plastic limit field test. This test is a field check of the soil moisture content, below which the soil may be manipulated for purposes of installing the STA and above which manipulation may cause smearing and compaction.
The depth at which the test is run depends on the type of system being installed. For below-grade systems, the plastic limit test should be performed at the infiltrative surface, where effluent will leave the media and enter the soil. In an above-grade system, such as a mound system, the soil should be tested at the surface and to the depth of scarification.
If a fragment of soil can easily be rolled into a wire 1/8-inch in diameter, the moisture content is above the plastic limit. If the soil is dry enough to be friable (crumbles easily) and falls apart when rolling it into wire, the moisture content is below the limit and installation can proceed. Do not add water when performing this field procedure.
Using the results
To limit impacts on the soil’s natural structure, excavation is only allowable when the soil is below the plastic limit and when the soil is dry enough to be worked. If considerable construction activity has caused compaction, then the ability of the soil to transmit liquid will be seriously reduced and failure is more likely. The plastic limit should be checked for any soil sandy loam or finer to assess soil moisture.
Clay soils which are too dry when worked may be smeared by the machinery’s bucket. When excessively dry soil is manipulated and exposed, fine soil particles can be separated from each other and stratified into layers or even become airborne. Stratification can negatively influence the movement of wastewater in the STA. Avoid blowing soil across a job site because some may be deposited and add unwanted fine material to media on the site.
Too dry?
To determine if a soil is too dry, start by feeling it. If it is a loam or silt soil and feels like talcum powder, it is likely too dry. If a dry clay soil gets shiny or glazes when being excavated, it is also likely too dry. If that is the case, either wait for rain or apply a limited amount of water over the area. Application of water should be done very carefully to make sure the site doesn’t get too wet.
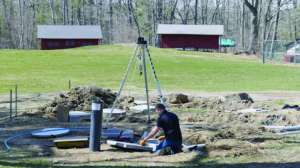
System prep
If the soil moisture and structure are where they should be, the next step is thinking about placement of components. Determine where the supply from the septic or dosing tank will connect to the distribution system in the STA. The supply line to the aboveground system area should be installed prior to soil surface preparation. The trench excavated to install the discharge pipe should be carefully backfilled and compacted to prevent seepage of effluent.
The total area selected for the aboveground system should be roughened to thoroughly break up any existing sod or other vegetative layers and to provide a suitable transition zone between the original soil and the soil that will be placed to construct the aboveground system. The goal of scarification is to expose the natural soil structure and not to damage it.
Prepare the site by breaking up, perpendicular to the slope, the top seven to eight inches so as to eliminate any surface mat that could impede the vertical flow of liquid into the in situ soil. One way to do this is to work around the perimeter of the system with the backhoe, using the bucket teeth to leave the surface rough. You can also use a moldboard plow or a disc plow, but they need to be thrown upslope and should also be run perpendicular to the slope. Never use a rototiller to prepare the surface as it destroys the natural soil structure.
No matter the technique, it is important that the grass or other vegetation be turned over so there is not a lot of vegetation at the surface. It can create a pathway for water to flow sideways and breakout where the system meets the original grade. In no case should any surface soil be excavated and moved more than one foot from its original location.
Timing
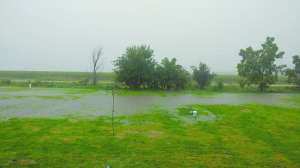
Aboveground system construction should proceed immediately after surface preparation is completed. The prepared surface should be kept free of all traffic, and every effort should be taken to prevent rain from falling on the prepared soil surface. Cover the area with clean sand and/or media to protect the soil as soon as possible. If it rains after the scarification is completed, but before it can be covered, wait until the soil dries out before continuing construction and contact the designer or permitting authority for a determination regarding the damage done by rainfall.
For larger systems where traffic must occur over the dispersal area, at least six inches of sand should be kept under the tracks of the transport vehicle to minimize compaction of the scarified layer. Maintaining the soil’s ability to accept effluent is a critical piece of the installation procedure.
Proper preparation of the surface will help to ensure proper onsite wastewater treatment for the life of the system.
Continue reading for free