Interested in Onsite Systems?
Get Onsite Systems articles, news and videos right in your inbox! Sign up now.
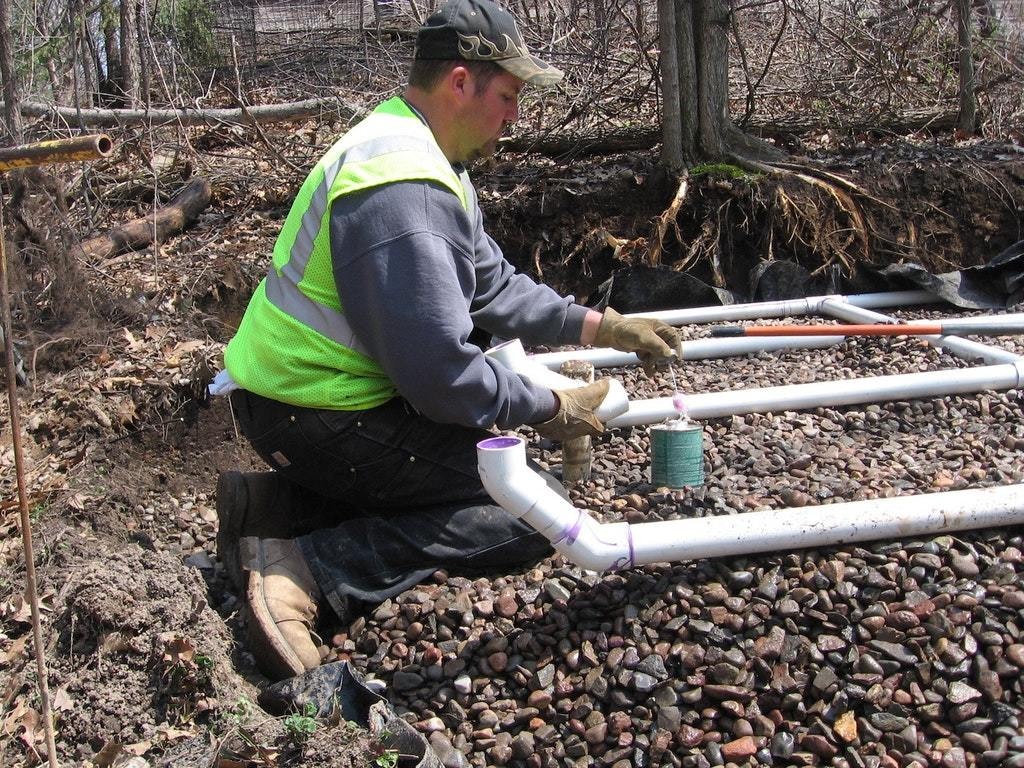
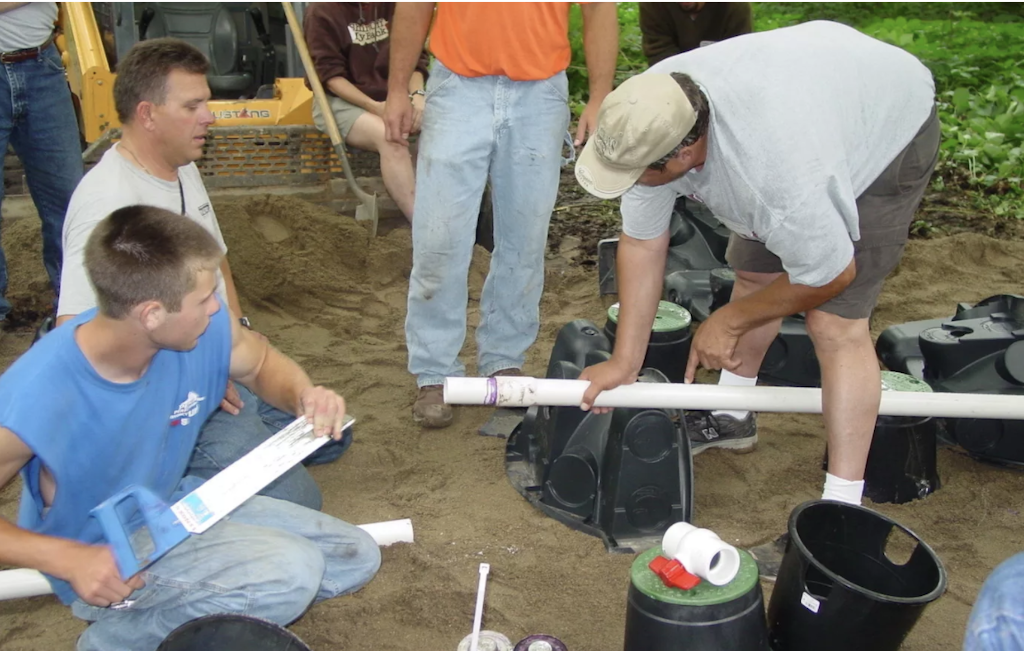
Onsite Systems + Get AlertsSolvent welds, threaded connections, mechanical joints, and gaskets are the most common methods of connecting PVC pipe. For applications in the septic world, solvent welds with slip joints are the most common. These solvent welds are referred to as “glued” and the solvent as “glue.”
The solvents (PVC primer and cement) emit strong organic vapors, so always work in a well-ventilated area. The cement and primer should be stored with the lid sealed and and be kept away from heat or open flames. The glue should be used within one year of the date stamped on the container. Most important, all manufacturer recommendations must be followed.
Solvent-welding
There are several key points to keep in mind when solvent-welding PVC connections:
- It is critical that the exterior and interior surfaces to be joined are clean and dry. If wet conditions cannot be avoided, manufacturers offer solvents that can be used in the rain.
- Before priming and gluing, the fit of the connection should be tested. If you have made a measurement mistake or if the fitting is out of round, testing the connection will save the expense of purchasing replacement fittings.
- PVC cleaner and primer are not interchangeable. Cleaner is used to remove manufacturing lubricants and dirt from the pipe and fittings. Primers are solvents that are used to soften the pipe and fittings prior to applying the cement. A suitable primer penetrates and softens the surface more quickly than the cement alone. There is no substitute for primer. Many local building authorities specify purple primer as a means of ensuring that primer was used. Do not use water, gasoline or any other substitutes for priming PVC surfaces.
There are many different types of primers and glue on the market. They differ mostly by viscosity. It is important to make sure that the primer and glue is appropriate for the pipe type, size and air temperature. The primer and glue should not be adjusted or thinned by any means. If they begin to look jelly-like or their viscosity has changed, they should be discarded. Read the warning labels and take necessary safety precautions such as protective equipment for eyes and skin.
Primer should be applied to the fitting socket and the pipe end, making sure that the primer does not puddle inside the socket. Time must be allowed for the surface to soften. The amount of primer and time may need to be increased when the temperature is cold.
There are a variety of applicators for primer and glue. Daubers are typically provided by the supplier and can be used on smaller diameter pipe. Brushes, with natural bristles, can be used on any diameter pipe. Rollers are commonly used for 4-inch diameter and greater. As a rule of thumb, select an applicator that is at least half the diameter of the pipe.
In order to have an effective solvent-weld, apply sufficient glue to fill the gap between the pipe and fitting. The primer and glue work to dissolve the two surfaces. When the pipe is inserted into the fitting, the two surfaces blend and become one as the primer and glue evaporate. The joint strengthens as the PVC hardens, so it must be allowed to fully cure to reach its full strength.
It is important to use the right type of glue. Read the label carefully, as the wrong glue can melt the pipe. Brush on a coat of ASTM-rated glue, such as ABS, PVC or Styrene, that is matched to the type of pipe and fitting you are using. As the wall thickness of the pipe increases, more viscous glue is needed. Glue must be applied to the inside of the fitting as well as the outside of the pipe. Use the correct amount of glue on the inside of the fitting because excess glue will be pushed into the fitting as the pipe is inserted. Do not allow the cement to puddle or run down the inside of the fitting. The pieces must be assembled quickly while the cement is still wet. If it dries before you have connected the pieces, then you must reapply the glue.
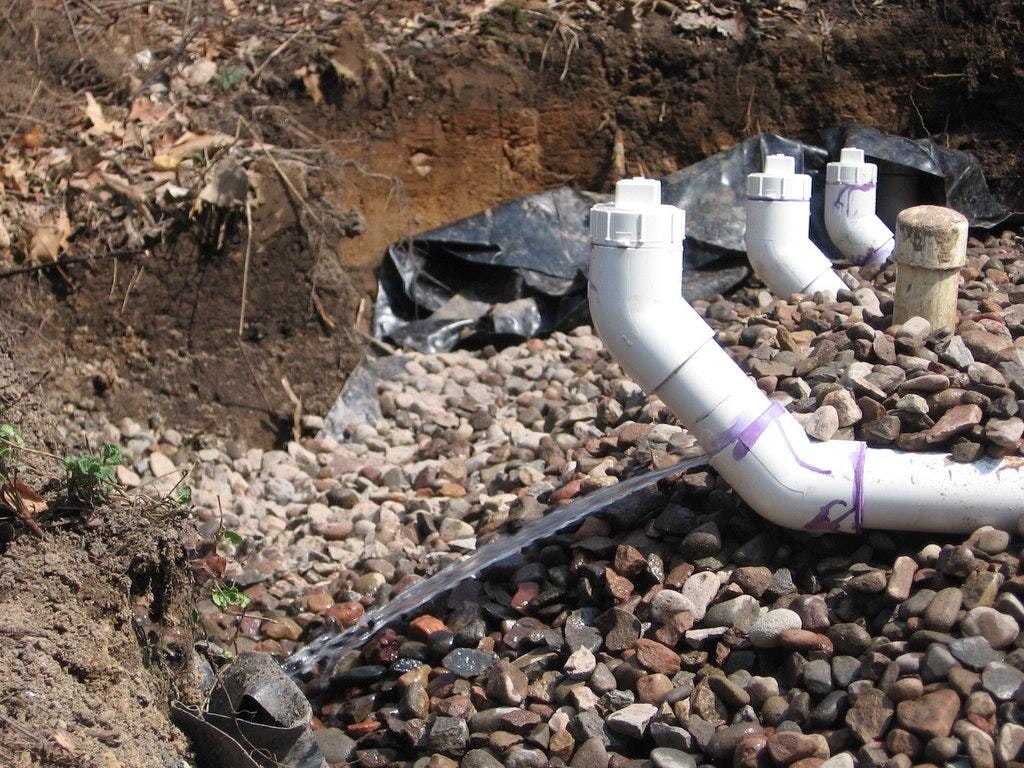
Push the pipe fully into the fitting while turning a quarter turn to distribute the cement evenly. The twist breaks up insertion lines and helps to spread the glue. The connection must be held firmly for 15 to 30 seconds to prevent the joint from pushing apart, providing the glue a chance to begin to harden. Wipe the excess bead of glue that forms on the outside of the connection to prevent the excess glue from continuing to dissolve the pipe.
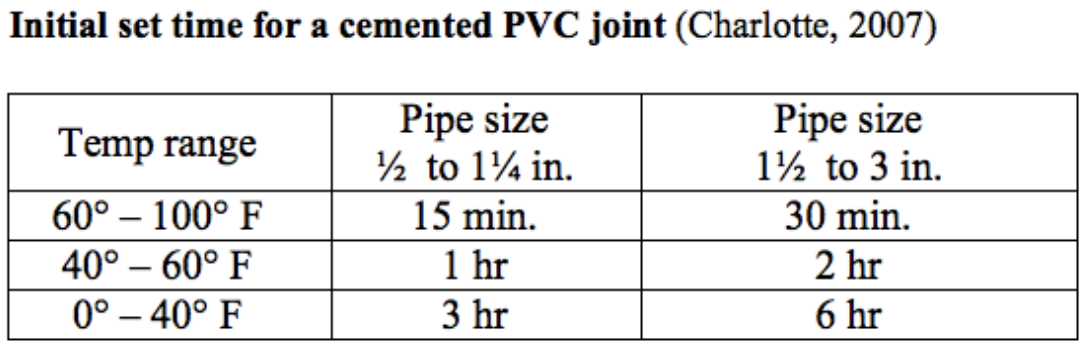
The joint should not be disturbed until it has initially set. The amount of time the joint needs to initially set is dependent on the air temperature and humidity. Be sure to use a primer and cement that is appropriate for the weather conditions. The table below provides the recommended initial set times.
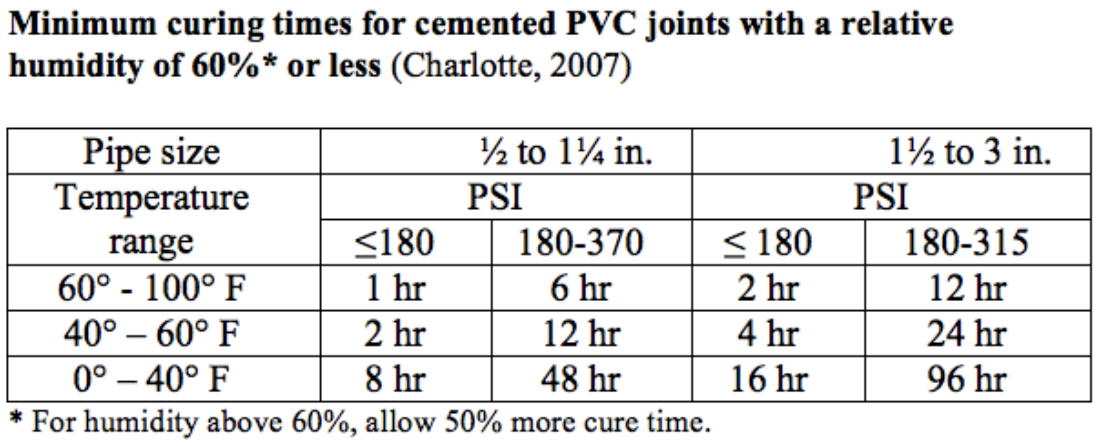
The joint should not be pressure tested until it has fully cured. The exact curing time varies with temperature, humidity and pipe size. The table below indicates suggested curing times.
About the author: Sara Heger, Ph.D., is a researcher and educator in the Onsite Sewage Treatment Program in the Water Resources Center at the University of Minnesota, where she also earned her degrees in agricultural and biosystems engineering and water resource science. She presents at many local and national training events regarding the design, installation and management of septic systems and related research. Heger is the President-Elect of the National Onsite Wastewater Recycling Association and she serves on the NSF International Committee on Wastewater Treatment Systems. Ask Heger questions about septic system design, installation, maintenance and operation by sending an email to kim.peterson@colepublishing.com.